Classic Color Combination

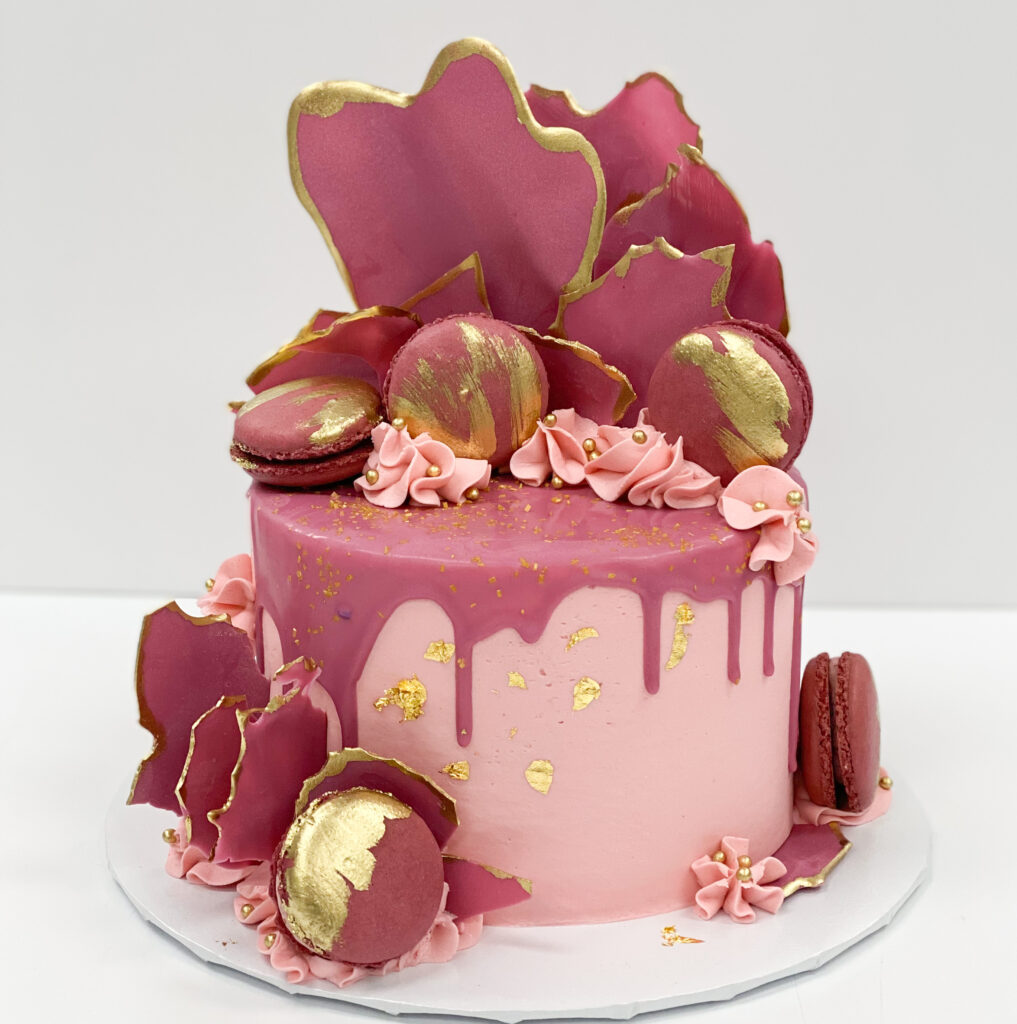
Is there such a thing as too much pink? Especially pink paired with gold? We don’t think so and neither did this client.

This was a small cake – 6″ round – to serve up to 10 people. This cake all started with the the pink chocolate accents. We made large chocolate swipes on parchment paper and let it dry. Once dry, the chocolate pulls away from the parchment and you’re left with these perfect pieces for cake accents! We added a gilded edge on our chocolate pieces and placed them around the cake giving it lots of dimension and height.

For the base of this cake, we iced it in a light pink for a contrast to the darker pink. After icing the cake smooth, we added a pink drip all around the cake. We then added the edible gold leaf flakes. After the chocolate pieces and gold leaf were on the cake, we added pops of buttercream, gold sugar pearls and macarons. We dusted the macarons to match the chocolate and then added gold accents with a gold highlighter powder mixed with vodka for painting.

There were lots of little extra touches on this cake to make it the perfect combination of pink and gold…just what the customer wanted!

Two Gifts in One!

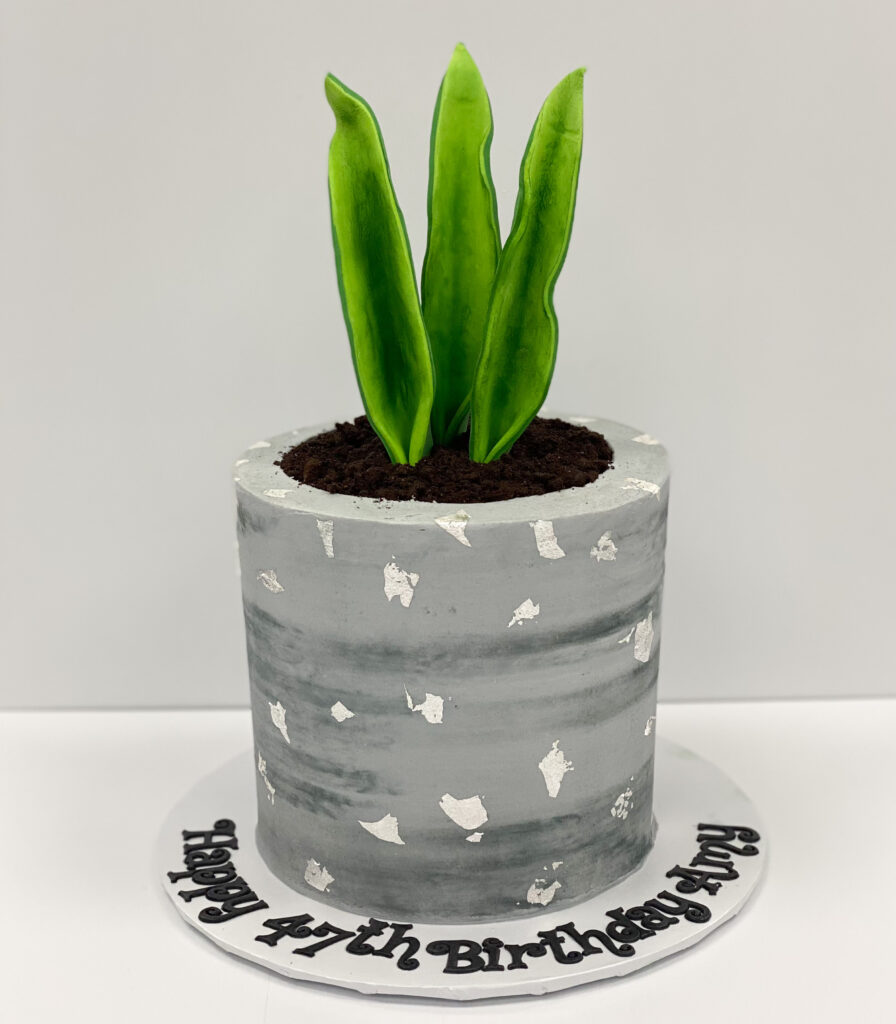
We were so excited to receive this order. Not only was it a cake for a friend of the bakery, but it was essentially two gifts for the birthday girl in one! Why JUST give her a plant when you can give her a plant CAKE! This is exactly what her husband decided when he placed the order.

For this design, we stacked three layers of cake and layered them with buttercream. For the outside of the flower pot, we iced it in a few shades of gray to get the marbled stone look. After chilling the cake, we cut a circle out of the top and filled it in with oreo crumbs for the dirt. We added the edible silver leaf and lfondant lettering on the cake boards.

For the plant leaves, we skewered green fondant and let them dry in a leaf shape. Once dry, we dusted the leaves with petal dust to give them some shading and placed them into the cake. The overall look of a potted plant is both super cute and delicious! Happy 47th Amy!!

It’s a Jungle Out There!

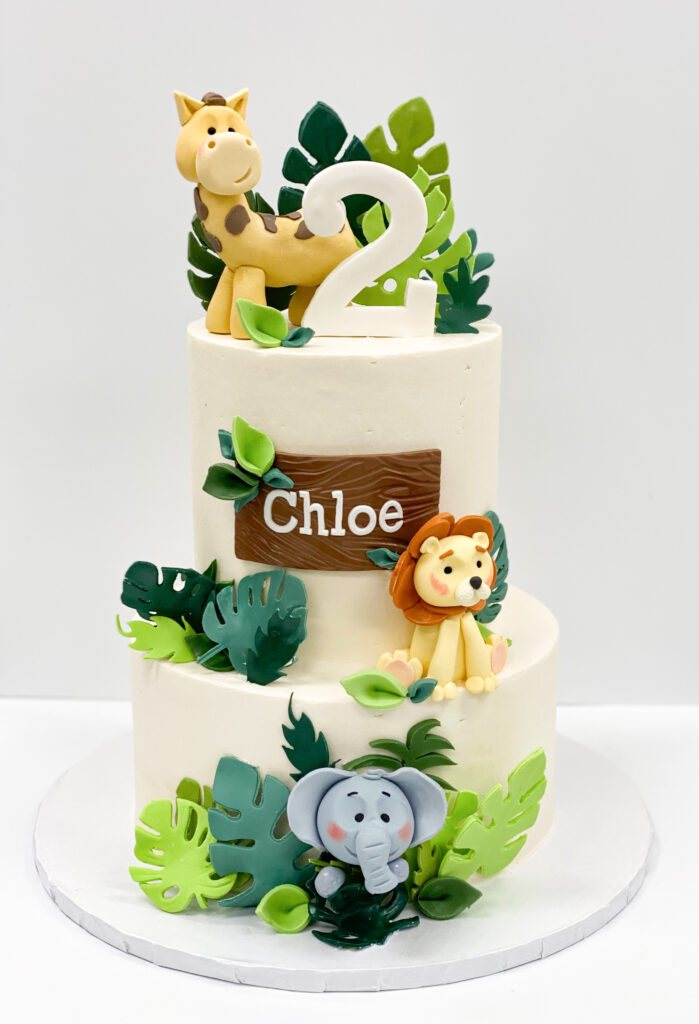
There are some cakes that you just fall in love with. The colors, the characters, the style of this cake was just too cute! This cake was for a second birthday with a jungle theme. Some jungle cakes are busy with too much going on, but this cake was simple and sweet in its design.

We started creating elements for this cake about a week before it was due. We needed to give the leaf accents and animals time to dry. When creating 3D fondant sculpted animals, you always have to do them in phases. You will start with the body and head separate. If you try to assemble to animal too quickly, the weight of the head can squish the body or cause the fondant to wrinkle. To avoid this, we created the core pieces and let them dry. Once dry, we were able to assemble limbs, ears and tails.

We also had to create the leaf accents, so they would hold their shape when placed on the cake. We used a variety of green colors of fondant and made differend shapes and sizes of leaves.
We also created the #2 topper in advance. We made this the same color as the off-white buttercream, so it would not compete with the animals and leaf accent colors. To make the number topper, we cut out the #2 twice and sandwiched floral wire inbetween the two layers of fondant. Once dry, this allows for the number to be skewered into the cake. The wire is thin enough not to be seen or cause a bump in the fondant, but stong enough to secure into the cake and hold the number upright.

When it came time to actually create an assemble the cake, we iced each tier in off-white buttercream and let it chill in the fridge. We then stacked the tiers and added the birthday girl’s name, “Chloe” on a wood-like plaque. This didn’t need to be made ahead of time sinde it’s placed directly on the cake. We then added all the leaves and animals to the cake in a staggered pattern to balance the design.

We think this one turned out super cute! Happy 2nd Birthday, Chloe!!