
WhataCAKE!
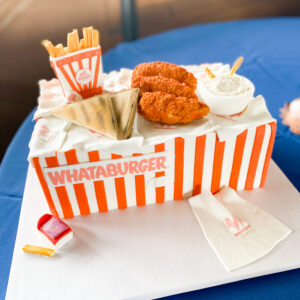
Cake that doesn’t look like cake is my favorite kind of cake! This Whataburger meal cake was actually a Groom’s cake that ended up being the talk of the reception […]
Cake that doesn’t look like cake is my favorite kind of cake! This Whataburger meal cake was actually a Groom’s cake that ended up being the talk of the reception […]
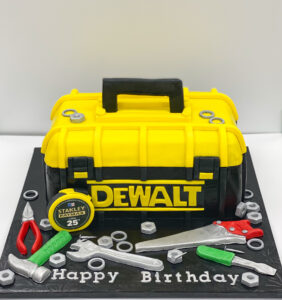
If you’re looking for a cake for the handy man in your life, look no further! This toolbox cake is sure to be the talk of the party! For this
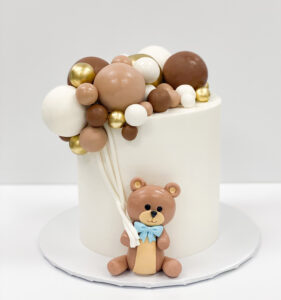
So simple and so sweet! This baby shower cake was a joy to create! For this cake, we started by sculpting the teddy bear using fondant. We colored the fondant
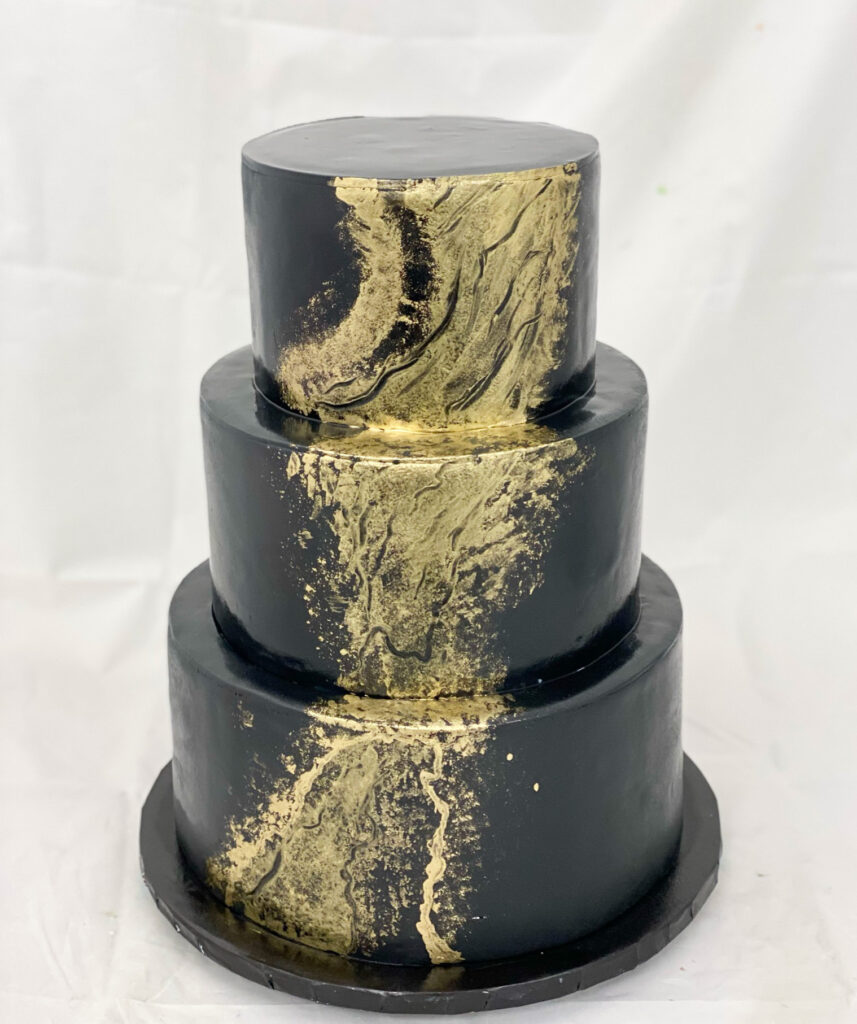
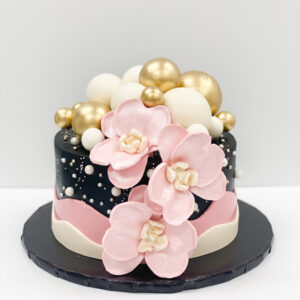
There are some color combinations that are simply classic, and black and gold is truly one of them. It can be masculine, feminine, elegant, dramatic and dark. Sometimes all at
Every once in a while we get a cake request that is unique and incorporates so many fun elements – all into one cake! This week, this was that cake!

We are well into the 2022 wedding season and seeing a variety of gorgeous trends emerge! The pressed flower look made the rounds through the Spring and Summer, which featured
Every year from October to New Year’s we create a variety of client gifts for our corporate customers. I love this time of year not only because of the holidays,
Talk about a centerpiece! This cake had it all! Sugar flowers, metallic accents, fondant ruffles and more! This cake, like all of our orders, started with creating the accents that

We have had so many fun Spider Man themed cakes and requests lately! Anytime there’s a new movie or popular TV show, we always get an influx of specific cakes.
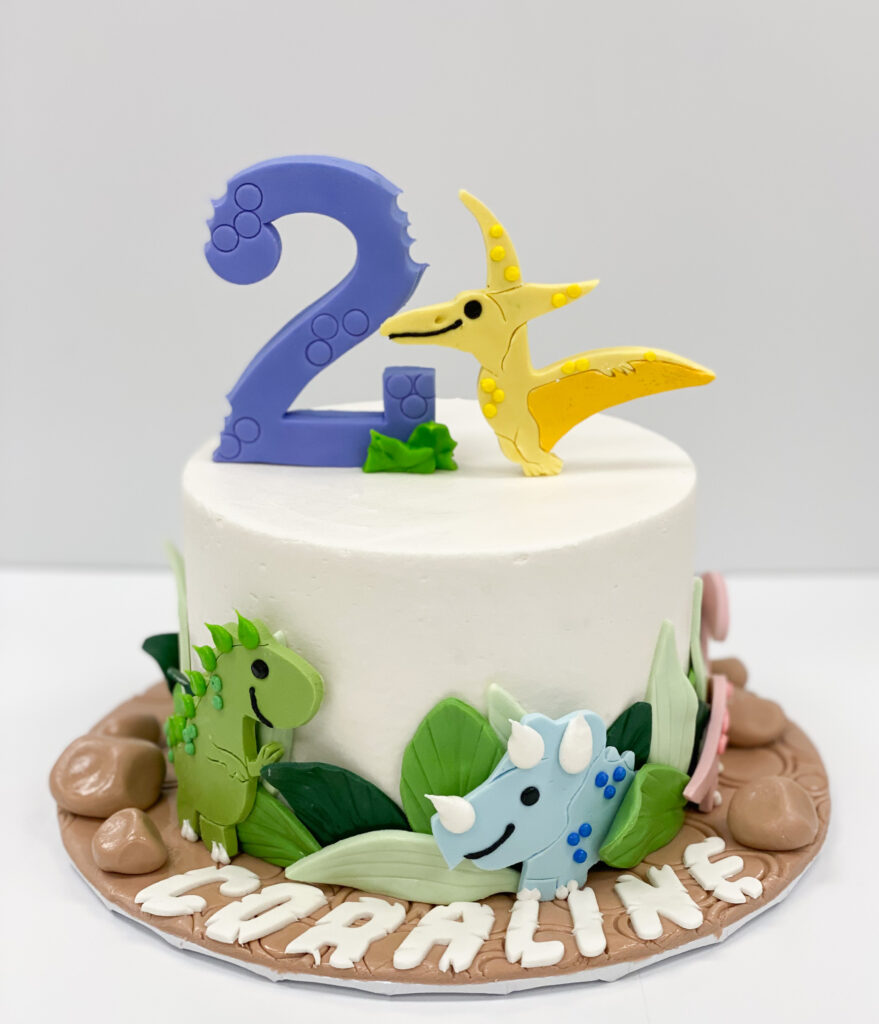
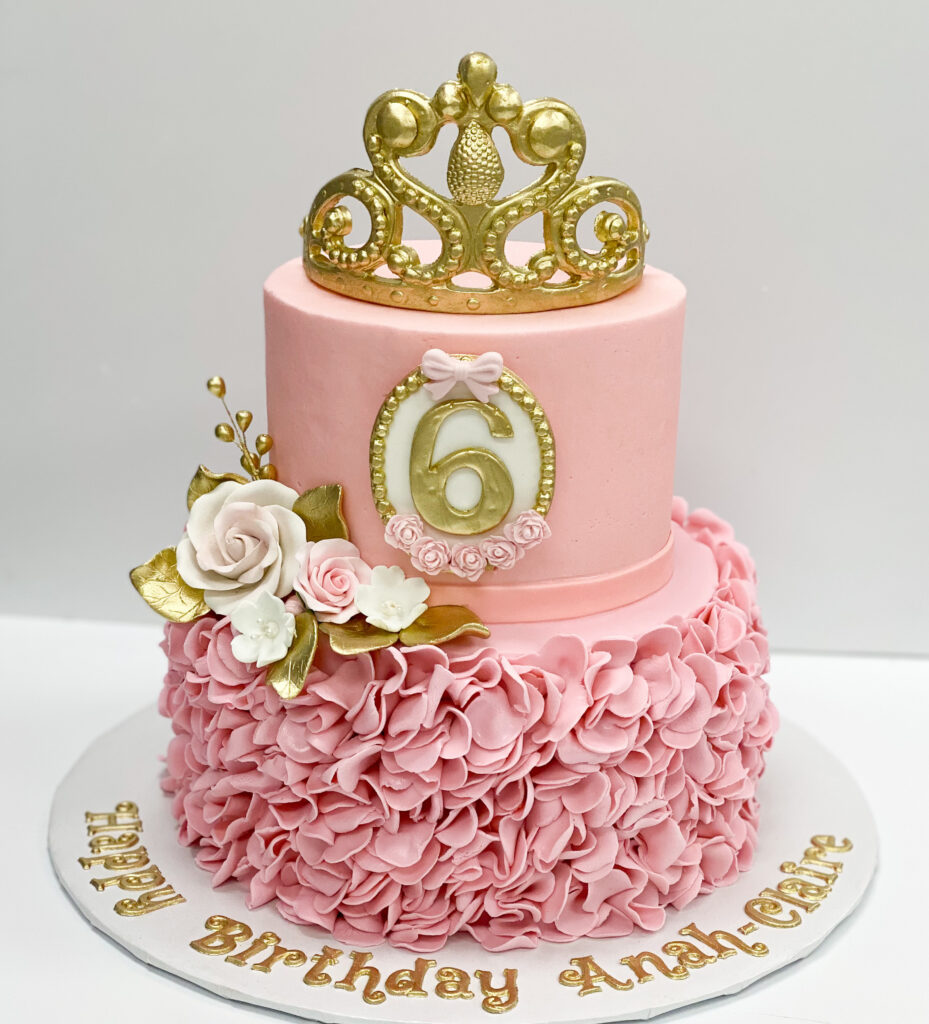
We have done birthday cakes in all sorts of themes from princess to superhero and every animal from cats to tortoises, but our most popular theme for children’s cakes is,