It’s time to pop the bubbly! We are often asked to create cakes with mini liquor bottles, coolers with beer bottles or, lately, these champagne cakes. Most often, these are 21st Birthday Cakes and they typically include a real, mini champagne bottle.
The customer supplies the bottle that they want us to incorporate into the design just as customer provide toy toppers for children’s cakes. We, however, have the task of inserting it into the cake without it damaging the cake or undermining the stability of the cake.
To create the look for this cake, we typically will scoop out a portion of the cake. If you just insert the bottle into the cake, the displaced cake has to go somewhere and it can shift and cause the cake to crack. So we remove a small portion of cake and insert the bottle with a little buttercream to hold it in place.
We then can decorate the cake as usual. For this design, we added a white drip around the top edge and hand-painted it silver. We then added top and bottom buttercream borders. Next we added fresh flowers and silver painted macarons and other chocolate and edible accents.
What do you think? Would you want one of these to celebrate your next milestone?
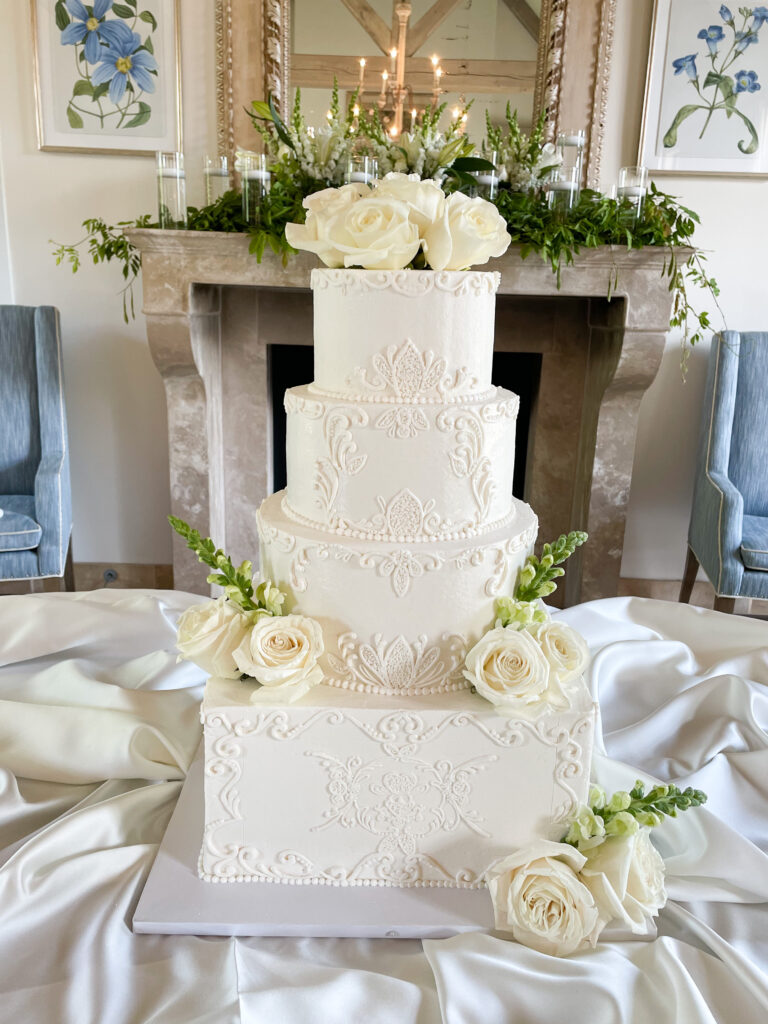
There is something special about residential weddings. When someone welcomes you into their home to set up their wedding cake, its sacred and sentimental and special.
This wedding was coordinated by BeYoutiful Occasions and every detail was amazing! For the cake, we went with a four-tier mix of round and square tiers iced all in smooth, white American Buttercream. The bottom tier was a jumbo tier giving the cake a substantial base for the three round tiers. This cake served about 150 people. Each tier had custom, hand-piped scrollwork in buttercream with tips 2 and 3. Fresh flowers were added at delivery. We absolutely loved creating this cake!
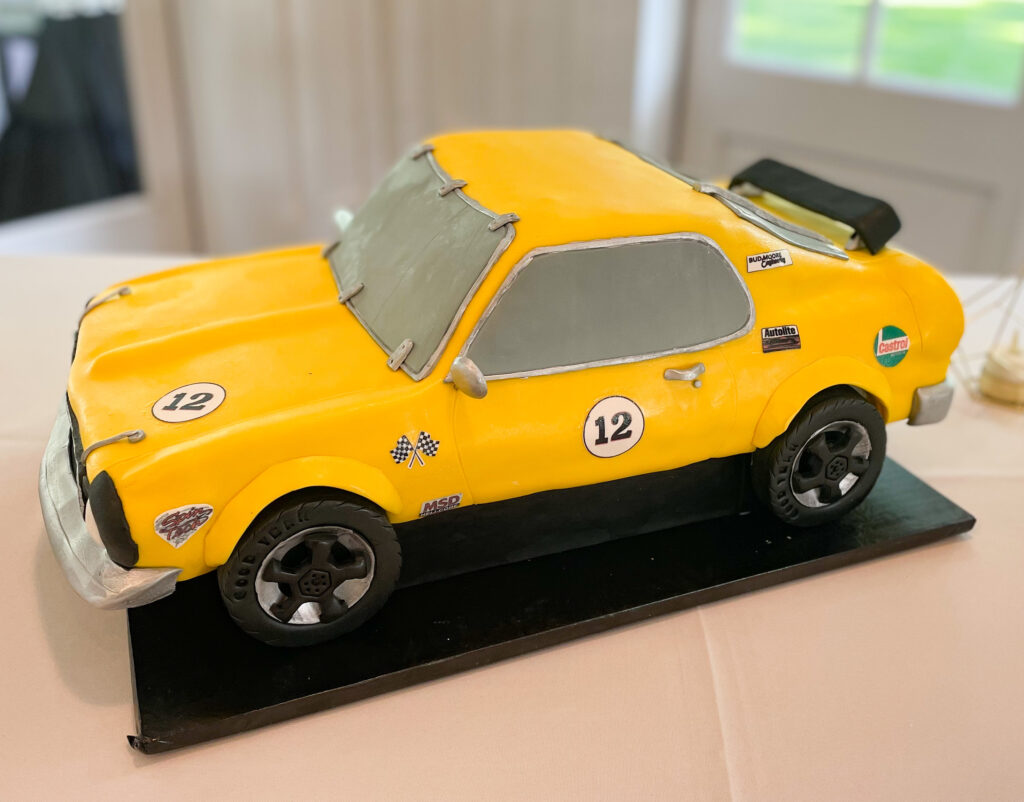
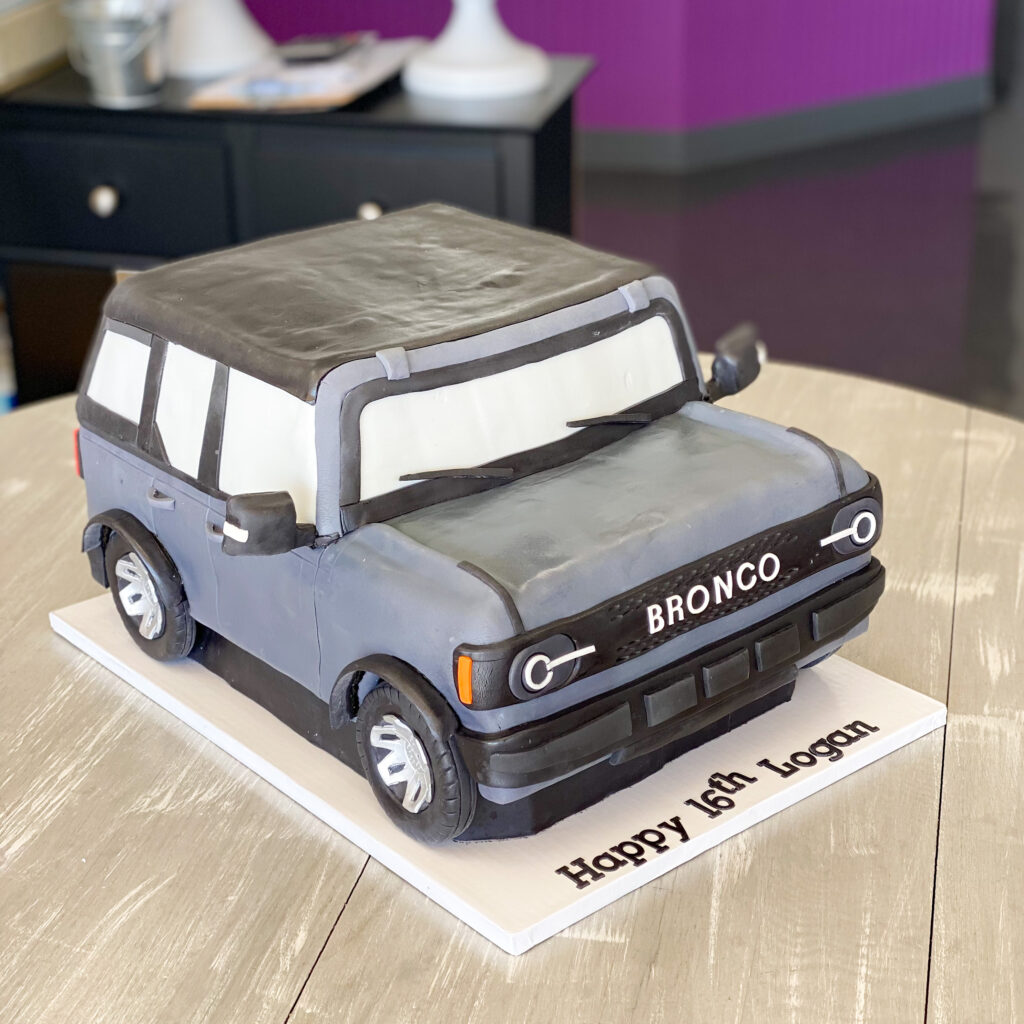
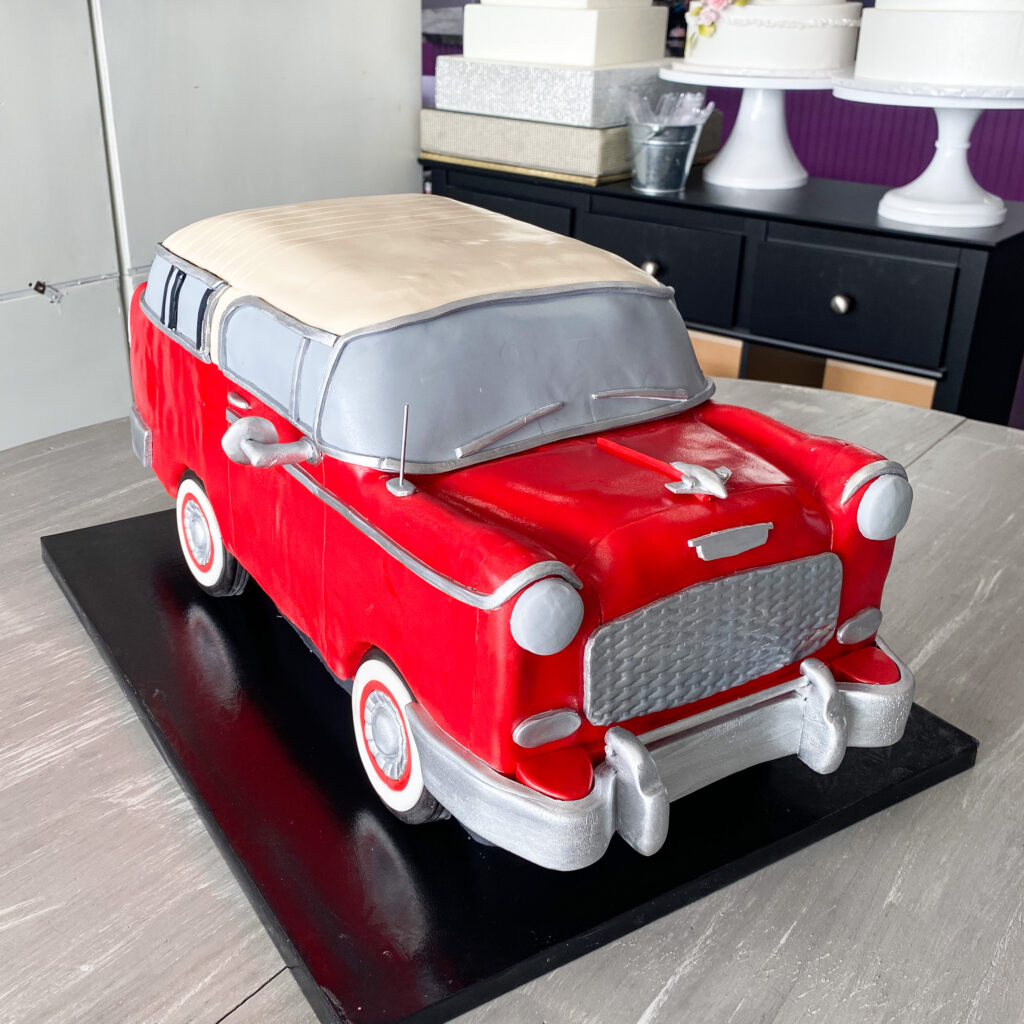
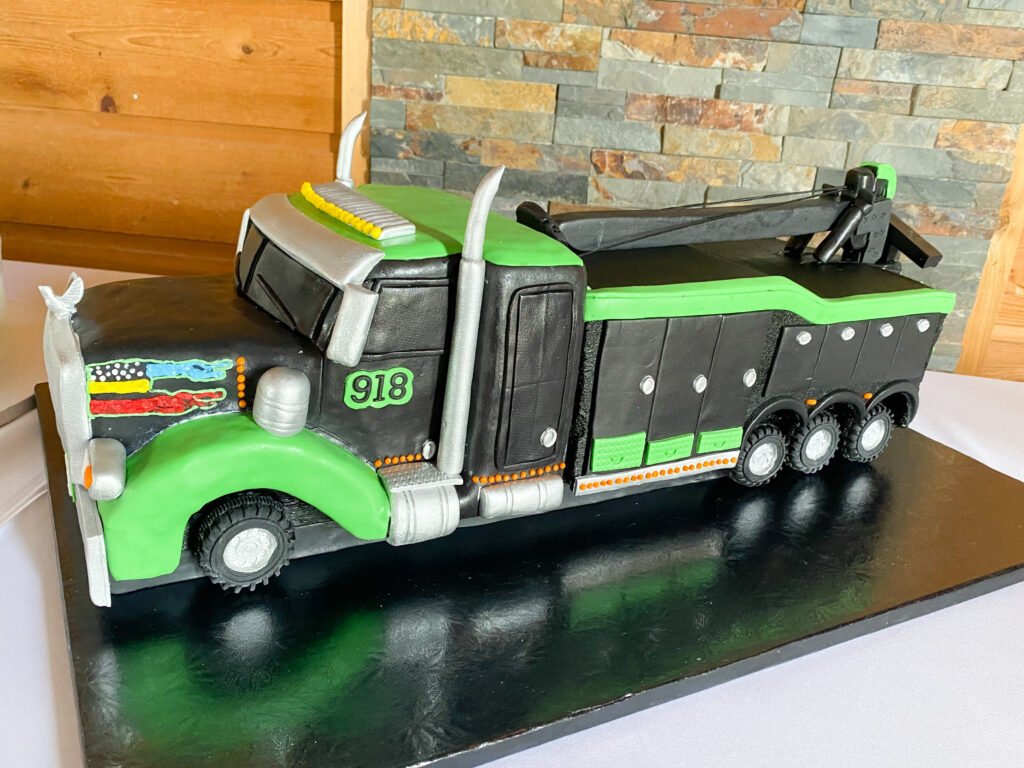
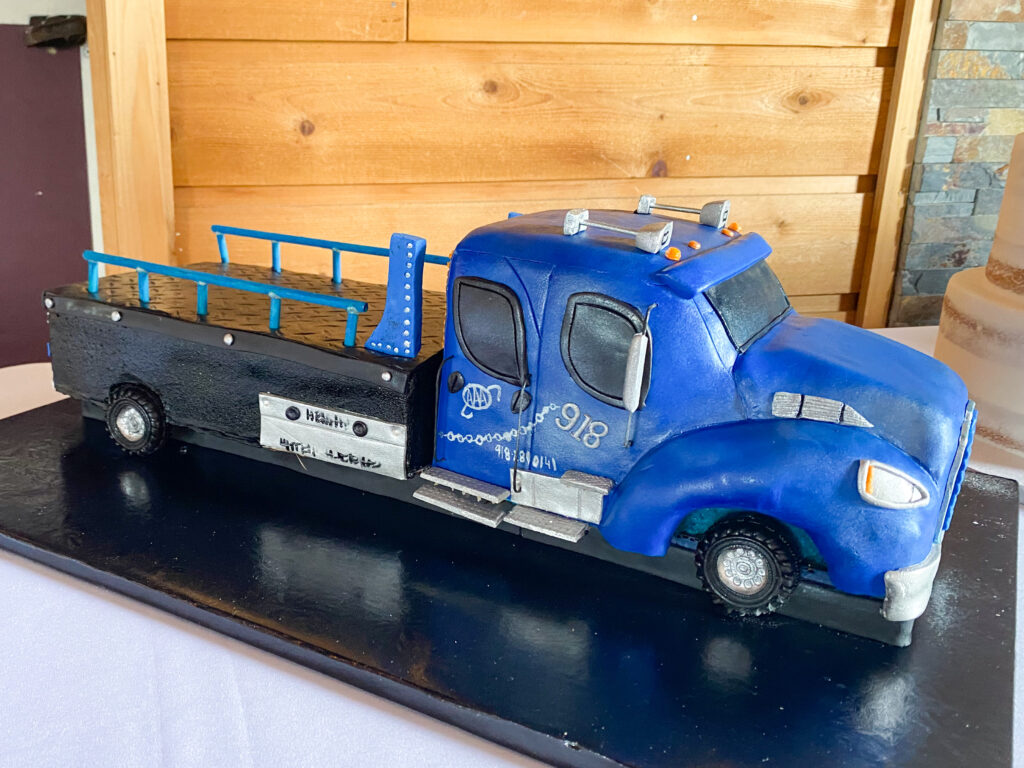
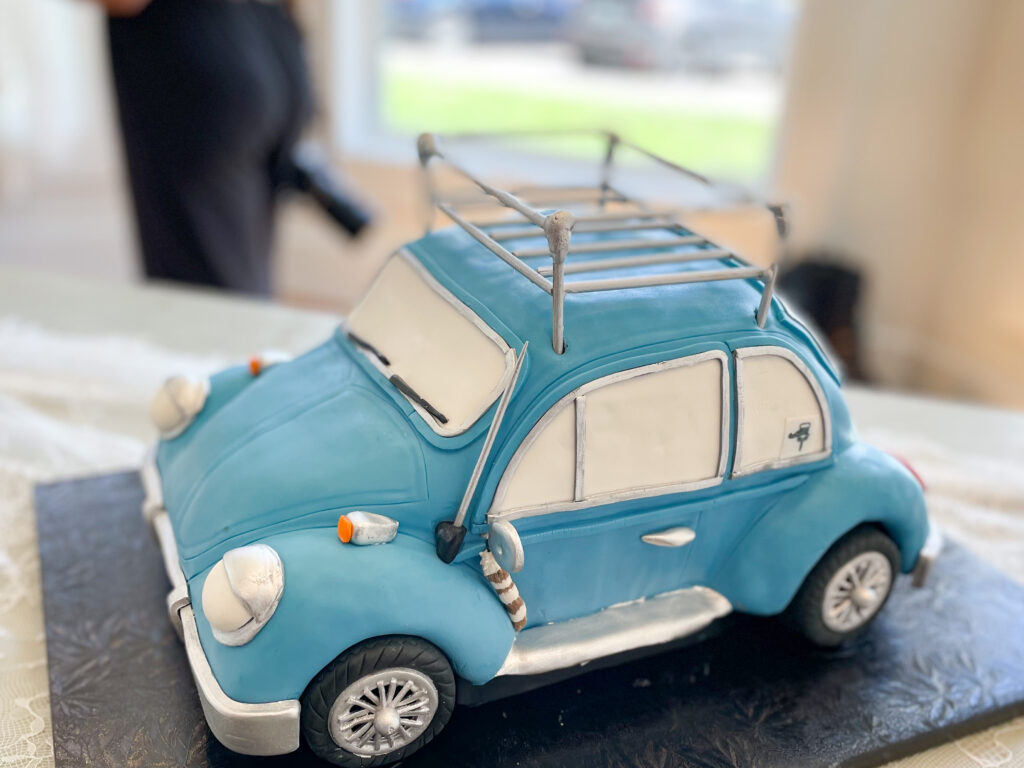
Three dimensional cakes are some of the most fun, yet time consuming to create. They involve research, specs and measurements, carving cake, fondant elements and accents, internal structure and more. We get many requests for them, but often the higher price tag deters people from moving forward. Like anything custom, these cakes take quite a bit of time and skill to create. We can create several traditional cake orders in the same amount of time it takes to create a car or truck cake, so it makes sense that these cakes cost three or four times the amount of a traditional party cake.
When we start the process of creating a car cake, we start with images of the actual car or truck. We look at images from every angle that we can. We take into account the number of servings that the client needs and choose what size cakes to bake. Because we often don’t know just what size the car will be until its carved, we can’t create too many accents, such as tires and side mirrors, in advance.
Once the cakes are baked, we layer and stack them with the appropriate fillings and internal supports. We then begin carving with a serrated cake knife. We carve to the basic shape and add a crumb coat of icing to lock in crumbs and moisture. Once this portion of the cake is chilled, we carve and reshape a bit and then add another coat of buttercream with a smooth and crisp finish. Many of these cakes are covered in fondant, so we can give them shine or paint them with a metallic or chrome-like finish.
Once the base layer of fondant is on the car, we start the process of elevating it. Up until this point, the body of the car is sitting flat on a board. But as you know, car bodies don’t typically drag on the ground, so we need to raise them up and add tires. We do this with a block support under the center of the cake, which is typically edible such as rice cereal treat sculpted into a block or rectangle. We cut the board under the body of the car and place it on the block support. We attach it to the block with dowels, so it doesn’t move during transport.
Once the car is elevated, we can make and add the tires as well as other accents including bumpers, windows, handles, mirrors and more. We layer these onto the cake until the details start to take shape. We texture and paint these accents, so they mimic the look of actual car parts.
The last elements we add are logos and other customizations that the customer wants. We often customize the license plates or bumper stickers and other personal elements found on peoples cars and trucks. It’s these little things that really make these cakes special.
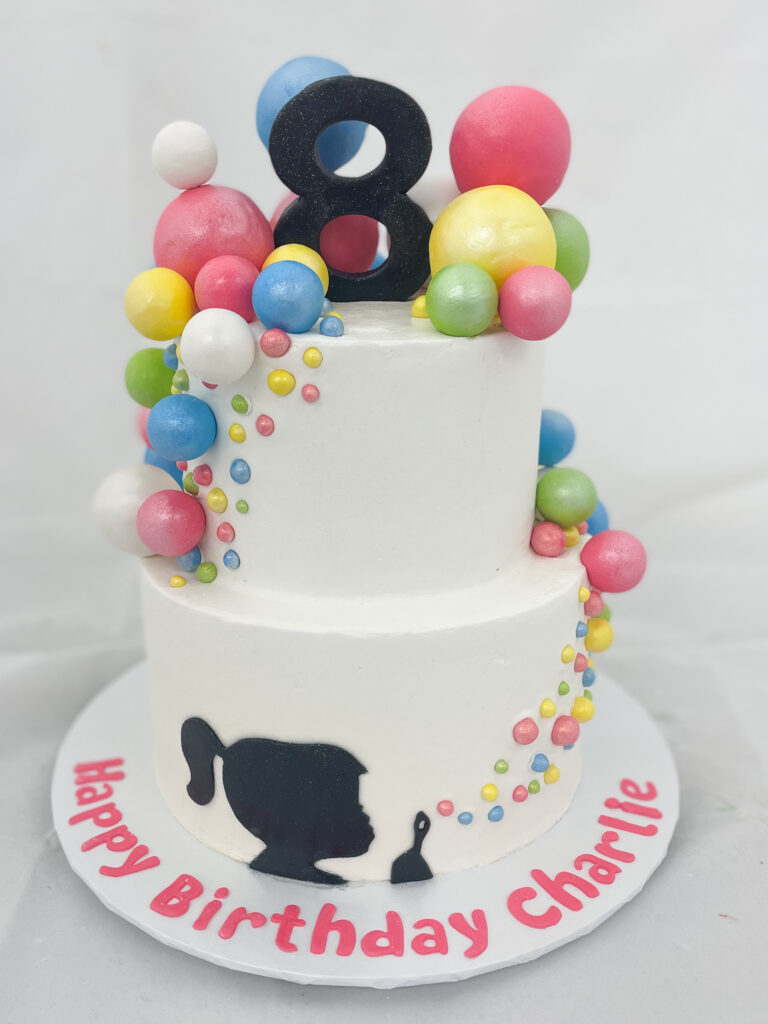
Happy cakes make us happy! There are some cakes that just make you smile and this is one of them!
The colors, the bubbles, the memories it invokes – everything about this cake is HAPPY!
This cake was a two tier to serve about 26 – a 6-inch stacked on an 8-inch cake. We started this cake by crumb coating and icing each of the tiers in smooth, which buttercream. Once those tiers were chilled, we used bubble straws and dowel rods to stack the cake.
Once stacked, we then can begin decorating this cake. We made the number eight topper from black fondant and skewered it, so it could be inserted into the cake. We brushed it with piping gel and poured black edible glitter on it to give it some sparkle. For the bubbles, we used a combination of sugar pearls, sixlets, gum balls and fondant balls. The largest balls are foam covered in fondant and dusted with luster dust to give then a pearlized finish.
For the silhouette of the girl on the front of the cake, we printed a template and cut it out. We rolled out our black fondant and used the template to cut out the shape of the silhouette. We attached this to the cake with a little vodka or piping gel. Once this was in place we could begin to place our “bubbles.”
We spiraled the sugar pearls, sixlets and gum balls up the sides of the cake increasing the size as we went. The foam balls and fondant balls were mostly on top. We added the number eight topper on top and the sentiment to the board to complete the look. Happy, happy, happy!
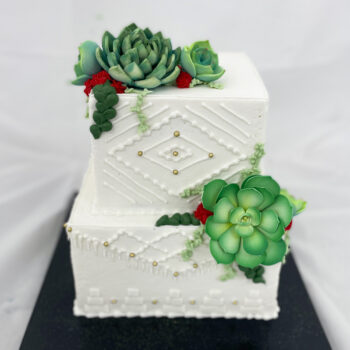
How gorgeous are these sugar succulents? We love the pop of color and freshness they added to this cake!
For this cake, we started with a 2-tier square cake (6″/8″ to serve about 32) and iced it in white, smooth American Buttercream. We piped the patterns around the sides in buttercream and accented them with sugar pearls. Finally, we added two bundles of sugar succulents and filled in the nooks and crannies with buttercream leaves, vines and accents. So pretty!
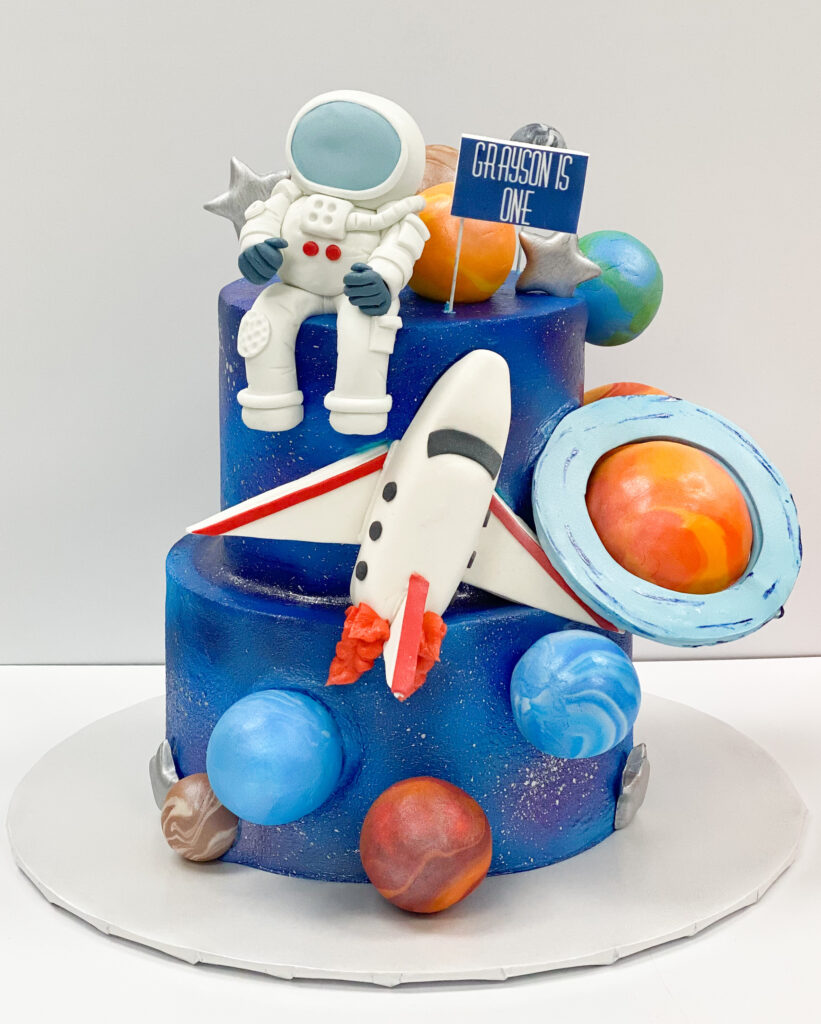
We started this order by creating the toppers and 3D accents about one week before the cake was due. We sculpted the astronaut out of fondant and set it on the ledge of a six-inch cake dummy to dry, so it would hold its shape when placed on the cake. We then sculpted the space shop and planets using mostly fondant and some styrofoam craft balls. Foam is lighter than fondant, so we sometimes use it for areas of the cake that we don’t want to tear or fall. We, of course, let the customer know that these parts aren’t edible. For the most part, we try to keep accents on the cake edible, but from time to time we have to use inedible structure for the design to be feasible and cost effective.
After the three dimensional accents were made, we baked and cooled the layers of cake. We crumb coated and final iced the tiers, stacked them using bubble straws and dowel rods and then airbrushed* the cake as a whole in a galaxy color scheme.
Once the airbrush spray had dried, we were able to start assembling the larger accents on the cake. We attached planets with buttercream and skewers and refrigerated the cake thoroughly for everything to set.
I love the way this one turned out! Happy 1st Birthday, Grayson!!
*People ask me all the time about the airbrush I use. I love my Grex Airbrush! I prefer the pistol style grip that doesn’t hurt my hand after a lot of use. It gives me much more control over the spray as well and is easy to clean. I highly recommend it!
If I didn’t own a bakery, I am pretty sure this is the cake my husband would get for my birthday.
Every. Single. Year.
Every time we get a request for this cake it comes with a story of someone who is known for their online shopping. We get it! And we love creating these package cakes.
The hardest part of these cakes is getting the buttercream to be the perfect cardboard shade. Once you achieve that, you can ice your cake and print your Amazon Prime tape on edible paper. Add a fondant Amazon logo and an edible, personalized mailing label and you’re all set!
While these cakes aren’t the most complex, they are always a talking point of the party. They bring a smile to people’s faces…and they are delicious! What more could you ask for?
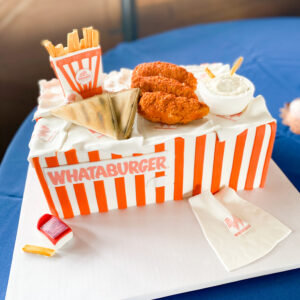
Cake that doesn’t look like cake is my favorite kind of cake!
This Whataburger meal cake was actually a Groom’s cake that ended up being the talk of the reception at Bellissima Ranch in Sperry, OK. The cake portion is the box, of course, but all the rest was edible/sugar/fondant made to look like fries, chicken strips, toast and gravy.
If you’re looking for a cake for the handy man in your life, look no further! This toolbox cake is sure to be the talk of the party!
For this cake, we made all the tools ahead of time, so they could dry and be painted. Some of the tools are free-handed and some can be made using a mold like this one. You just press your fondant into the mold – silicone works best – remove it from the mold and lay it flat to dry. Once it’s dry, you can paint it.
We also made the toolbox handle in advance, so it could dry and hold its shape. We used floral wire and skewers in it, so it could be placed into the cake like a topper.
Once all the 3D elements were made, it was time to start on the cake! We baked 1/4 sheet layers, stacked them and carved them with our favorite sculpting knife to round the corners. We crumb coated and chilled the cake. We were then able to cover the cake in fondant. We covered the top half in yellow and bottom half in black, added the latches, logo and details.
We placed this cake on a larger cake drum, so we had room for all the tools and the “Happy Birthday” message. Who do you know that would love a cake like this?
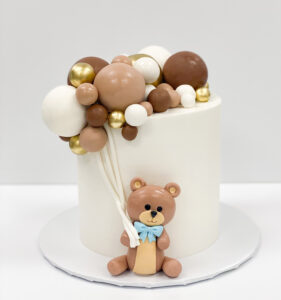
So simple and so sweet! This baby shower cake was a joy to create!
For this cake, we started by sculpting the teddy bear using fondant. We colored the fondant with our favorite gel coloring and started by sculpting the body. We then added each limb, the head and the ears. Each element of the bear is built piece by piece. The bow was made from a mold – so easy and cute!
Next up was creating the balloons. Some were made from fondant and some were made from lightweight styrofoam craft balls, which were covered in fondant to match the bear. All of these items are made in advance, so they have time to dry and hold their shape once it’s time to assemble the cake.
This cake was a 6″ round jumbo, meaning it was three layers of cake (or 6″ tall.) A standard tier is typically 2 layers of cake and only 4″ tall. These taller tiers are very popular at the moment and this particular design needed a bit more height for the balloons.
This cake was iced in a smooth, white American Buttercream. Once the crumb coat and final coat were chilled, we were ready to assemble this cake. We placed the bear on the board, the balloons on top and connected them fondant strings. We think this cake turned out beary cute!!